6.1 RESULTS TABLE
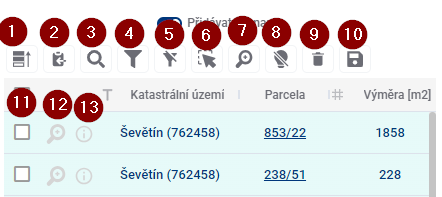
To control the results table, there is a group of tools above the table and another one directly in the table.
- Prioritize Selected - moves selected elements in the table before others
- Save selected to clipboard - and then you can paste the records into a text editor
- Search in data - a quick way to filter records using the text you enter
- Show/hide filter - show/hide text boxes to filter results for all columns
- Show only filtered in map - limits the visibility of features in the map to only those that are filtered
- Select elements in the map - allows to select and highlight a drawing by clicking in the map
- Browse to selected features - zooms to the selected features in the map window
- Disable highlighting of selected items
- Delete row - removes selected records from the results table. If none is selected, removes all of them.
- Export selected data - allows you to export the results table to a selected format, for example .xlsx
- Select item in table - click in the check box to select and highlight the record
- Browse to feature - zooms to the selected feature drawing in the map window
- Item information - opens detailed information about the item in the display panel
Select and highlight elements
When you hover over a row in the table, the row is highlighted and the drawing is highlighted in light blue in the map window.
Selected items are highlighted in dark blue in the table and in the map and can be selected either by checking the checkbox on the left side of the table or by clicking on the shape in the map window, but only with the Select items in map function (Button 6) enabled. Prioritize selected (Button 1) places the selected items at the top of the table.
Approaching the elements
Zooming the map to the elements can be achieved in two ways. Browse to selected elements (Button 7) zooms the map to the elements that are selected and therefore highlighted in the table, Browse to element (Button 12), located next to each record, zooms the map to that particular element.
Filtering elements
Element filtering allows you to display only those records in the results table whose attribute meets a certain condition. The easiest and fastest way to do this is to use the Search in Data tool (Button 3), which displays a text box to enter the desired constraint. Filters for all columns separately can be accessed using Show/Hide Filter (Button 4), and for each column you can still open a popup with a more detailed filter specification and change the operator from “equals” to “is greater than”, for example.
Element details
The details of the element can be displayed in the viewing panel by clicking on Information about the element (1) or on the button in the bottom right corner of the popup (2). From the viewing panel you can then use the blue link (3) to get to the Land Register Access website. This can also be done by clicking on the parcel number in the results table (4).

Data storage
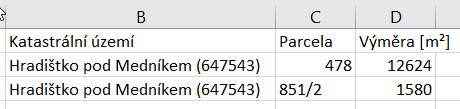
Selected rows from the table can be saved to a file outside MGM in two different ways. A quicker and simpler solution can be achieved by using Save Selected to Clipboard (Button 2) and then pasting into, for example, an .xlsx file. The result then looks as follows:
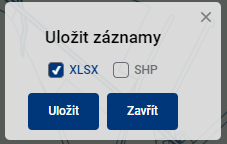
An alternative is Save rows (Button 10), which allows saving records again in the selected format - for example .xlsx or in a Shapefile file with geometry. The saved file has the current date in the name and contains more columns than saving to the clipboard. This spreadsheet data is identical to the parcel information displayed via popup or in the viewport.